2 Hummus Recipes – Roasted Red Pepper and Beetroot

Hi everyone,

As many of you may know, I consider hummus one of the greatest dishes on this earth.  A few weeks ago I visited this Mediterranean place at Haji Lane and was served some really bland tasting hummus =( Needless to say, I left feeling VERY disappointed and had a big gaping unsatisfied craving!

So Me+Unsatisfied cravings do not go well together. I made up for the craving by making home made hummus for 3 weeks straight! Haha i think I can safely say that my cravings are officially SATISFIED.

Anyway, I love making different variations of Hummus. These 2 weeks, my fav variations were the Roasted Red Pepper Hummus and Roasted Beetroot Hummus. SO YUM!! I’ve been basically pairing them with all my dishes – as a dip, a spread and a dressing for my salads!

You can check out my recipes for the Classic Hummus, Raw Vegan Hummus and Sweet Potato Hummus as well.

ROASTED RED PEPPER HUMMUS
red pepper hummus

WHAT YOU’LL NEED

1 large Red Bell Pepper
1 Can Chickpeas (try to buy those that are soaked in water)
2 TBS Tahini
2 cloves Garlic
2 TBS Lemon Juice
2 TBS Water
1/4 TSP Salt
Olive Oil

HERE’S HOWred pepper hummus
1) Preheat the oven to 180 degrees. Remove the stalk and seeds and slice the Red pepper in to stripes. Drizzle generously with olive oil and place in the oven for at least 40 – 50 min. Only remove it once the edges are starting to brown or blacken.

2) In a food processor, add all ingredients and process away.
> I don’t add much salt but taste as you process your hummus and add more till you find the taste that suits you best.
> I also like my hummus really thick. If you want a smoother consistency, add bit more lemon juice or liquid.

ROASTED BEET ROOT HUMMUS

beetroot hummus

WHAT YOU’LL NEED

1 medium Beetroot (mine was slightly more than 300g)
1 Can Chickpeas (try to buy those that are soaked in water)
3 TBS Tahini
1 large clove Garlic
3 TBS Lemon Juice
1 TBS Water
1/4 TSP Salt
1/2 TSP Cumin seeds
Olive Oil

HERE’S HOW

beetroot hummus 2
1) Preheat the oven to 180 degrees. Remove the skin and slice the beetroom into even pieces (not too thin or they may become chips!). Drizzle generously with olive oil and place in the oven for at least 35-45 min. Only remove it the pieces start to soften and caramelize.

2) In a food processor, add all ingredients and process away.
> I don’t add much salt but taste as you process your hummus and add more till you find the taste that suits you best. I acutally added abit more cumin afterwards because i simply love the taste. Feel free to add more if you wish.
> This hummus is thicker than the roasted Red Pepper one. Similarly, add more lemon juice or water if you don’t want it so thick.

Enjoy!!

Vegan Bean & Sweet Potato Chilli and Sweet Potato Hummus

MERRY CHRISTMAS EVERYONE!

mini-20131222_134226

20131222_133136

Whether you’re taking this time to feast, party, spend time with loved ones or simply to rest…I hope you’re enjoying yourselves this holiday season!  =)vegan potluck

Wanted to share a little about the recent Xmas Vegan Potluck we had (see previous post). Was great catching up with old friends and meeting new friends…also got to meet 2 readers (waves to Gigi and Angela!). Didn’t manage to take much pictures because it was SO HOT, but we had quite the spread!

IMG_20131222_142744

I contributed 2 dishes – Vegan Bean & Sweet Potato Chilli and Sweet Potato Hummus. I love making my own food, but I admit it does get a little bit intimidating cooking for a large group of people because you don’t know if it caters to their taste. But luckily, both dishes were very well received and I had a few people asking me to post the recipe…so (whew!) and I’m more than happy to share!

chilli and hummus

VEGAN BEAN & SWEET POTATO CHILLI

I can’t claim to have written this recipe. Got it off this link but changed a few measurements along the way. Also made it less spicy!

What you’ll need

  • 3 cloves garlic, minced
  • 1 small onion, diced
  • 2 medium sweet potatoes, peeled
  • 2 medium carrots
  • 1 red bell pepper
  • 2 tbsp olive oil
  • 1 can kidney beans
  • 1 can organic diced tomatoes
  • 3/4 cup vegetable broth
  • 1 tsp chili powder (please add more if you want it spicer)
  • 1 1/2 tsp cumin
  • 1/4 tsp cayenne (please add more if you want it spicer)
  • 1/2 tsp garlic powder
  • 3/4 tsp salt
  • 1/4 tsp black pepper
  • 4 pcs bay leaves

Here’s how

  • Chop and cube sweet potatoes, carrots and bell pepper.
  • Sautee onions and garlic in olive oil for a minute or two, then add sweet potatoes, carrots and bell pepper until onions are soft, about 5-6 minutes.
  • In a separate pot, add remaining ingredients and bring to a low boil. Add the sautéed vegetables and bring to heat to medium low.
  • Simmer, partially covered and stirring occasionally, for 20-25 minutes, until flavors have mingled and vegetables are cooked. Taste and add more spices if you want more heat.

SWEET POTATO HUMMUS

This hummus is quite thick and can be a little dry. But its very close to the texture of traditional hummus. If its too thick for you, feel free to add more olive oil or save a little of the chickpea liquid to add in.

What you’ll need

    • 2 sweet potatoes
    • 5 – 6 tbs olive oil
    • 1 can unsalted chickpeas
    • 3 tbs tahini
    • 3 cloves garlic
    • Juice of 1 ½ lemons
    • 1 tsp paparika
    • ½ tsp cumin
    • ½ – 1 tsp salt

Here’s How

    • Preheat oven to 180 degreees. Using a fork, poke some “holes” in the sweet potatoes so that they bake faster. Leave them in the oven for an hour till
    • Process all ingredients!
    • Add more olive oil and paparika when you serve…enjoy!

Raw Mango Cheesecake

Hello All,

Its been a while since I posted a raw dessert recipe and today I’m gonna share one of my favourite cheesecake recipes of all time!

raw mango cheesecakeMost homemade raw cheesecakes use pretty much the same ingredients – cashew nuts, sweeteners, lemon/lime and some fruit. But a while ago, while surfing through the AMAZING Detoxina’s blog, I realised she used zuchinnis in her cheesecakes! So I decided to give it a shot and the result was a texture and taste more similiar to the normal cheesecake than my previous recipes. No kidding !! I’ve since used zuchinnis in many of my cheesecakes recipes whilst playing around with the measurements and quantity…..and today’s recipe is by far the one I’m most satisfied with and its super easy! Sorry no step by step pictures for this post because I forgot to charge my camera battery :X

raw mango cheesecake

RAW MANGO CHEESECAKE

INGREDIENTS

Base
½ cup raw almonds
½ cup raw pecans
2 TBS agave nectar
1 TBS coconut oil
1/2 TSP vanilla extract
1/4 TSP sea salt

Middle
2 cup raw cashews
1 cup zucchini, peeled and chopped
5 TBS lemon juice
2 TBS coconut oil
1/3 cup agave
1TSP vanilla extract
1/2 teaspoon sea salt

Top
1 heaping cup mango, chopped (use ripe mangoes)
1/4 tsp turmeric powder

raw mango cheesecake

HERE’S HOW
Base
1. Pre- soak the almonds and pecans for around 4 – 6 hours
2. Process the almonds and pecans until the nuts are broken down into very small bits and crumbly.
3. Add in the agave, coconut oil, sea salt and vanilla and continue processing.
4. Transfer the mixture into your cake tin and press the down the base firmly. Try to make it as even as possible.
5. Leave the cake tin the freezer.

Middle
1. Blend all ingredients using a high speed blender till smooth.
2. Pour slightly more than ½ of the mixture into the cake tin and let it set back in the freezer for another 45 min – 1 hr.
Top
1. Add mangoes and turmeric to the remaining mixture in your blender’s container. Blend till smooth. Don’t worry you won’t taste the turmeric (won’t that be weird!) , it’s basically a natural yellow food colouring.
2. Pour the mango layer into the cake tin and let the cake set in the freezer for at least 5 hours.

raw mango cheesecake

Thaw for 15 min before you cut and serve. Garnish with cube mangoes and mint!
I really hope you enjoy this recipe and do share with me what you think after you’ve tried it!

Raw Thriple Decker Brownie

Hello all,

I’m really excited about today’s post! Been wanting to post this for some time now and yay I finally have time today.

Raw thriple decker brownie

Raw brownies are one of the simplest raw deserts to create. Its one of those uncomplicated deserts that can be made using few and simple ingredients and yet taste pretty darn amazing. Not surprising that its a dessert that most new raw foodists (including myself) always attempt first.

I recall my first time attempting the raw brownie two years back.. I was armed with my new food processor and was so eager to start that I cut my finger on the sharp blade. Hahaa but it turned out pretty good and I was eagerly offering all my (apprehensive) family members a slice (or two , as i would insist!!). Fast forward two years later, and a little wiser, I decided to shake things up abit  and make a thriple layer raw brownie for my best friend’s birthday potluck.

I’m soooooo pleased with the way this brownie has turned out. It tasted really delicious and everyone at the potluck couldn’t believe this was raw…or healthy. The only downside was that my layers weren’t that even…but I’m sure you can do a better job =)

Okay, enough rambling, here’s the Raw Thriple Decker Peanut Butter Chocolate Frosted Brownie, or

RAW THRIPLE DECKER BROWNIE (in short!)raw thriple decker brownie

WHAT YOU’LL NEED

BASE layer (the brownie)
2 cups walnuts (pre soaked, preferably dehydrated)
1 cup dates
1/4 tsp salt
1/4 tsp vanilla essence
4 1/2 tbs cacao powder
1/2 tsp coconut oil

MIDDLE layer (the peanut butter crunch)
1 1/4 cup raw rolled oats
1/2 cup raw peanut butter (or normal PB if you don’t mind it not-raw)
1/4 tsp salt
1/4 cup agave
*Add more agave if your peanut butter has no sweetener.

TOP layer (the chocolate frosting)
2 ripe avocados
1/4 cup cacao powder
1/4 cup agave + another 1 tbs
1 tbs coconut palm sugar
1/4 tsp salt
1/4 tsp vanilla essence

OPTIONAL
Coloured sugar rice (Yes this is not raw but i wanted to make it more cheerful since its a birthday cake! Omit this if you want it completely raw and add healthier options like chopped nuts)

HERE’S HOW

BOTTOM Layer
1) Line your pan with parchment paper.
2) Process the walnuts first. Many recipes say to stop processing once it becomes crumbly but personally I find that processing it longer till it becomes more like a paste (before it turns to butter) makes it way more fudgy.

brownie  layer
3) Add in the rest of the ingredients except the coconut oil and continue to process. Add the coconut oil last. Your base should have a consistency like the picture below. Don’t worry if its not that sweet because you’ll have your middle and top layer to balance out the flavours.

brownie layer
4) Press it into the pan, making sure that you press it down tight and the sides are all filled.
5) Leave it in the freezer.

MIDDLE Layer
1) Process the rolled oats till it becomes a little more flaky.
2) Add in the rest of the ingredients and continue to process.
3) Spread crumbs evenly on top of the base layer and press down evenly.

DSCN9116

DSCN9117
4) Put it back into the freezer.

TOP Layer
1) Simply throw everything in the food processor and process till you get a beautiful, smooth ganache. YUMMM

DSCN9119
2) Spread it on the top layer of the brownnie and back in the freezer it goes.

DSCN9121
DSCN91243) Let this stay in the freezer for around 4 – 6 hours. Sprinkle on toppings (optional) before you serve.

.

.

.

Raw thriple decker brownie DSCN9130

raw thriple decker brownie

Do drop me a comment or email if you’ve tried this recipe because I would love to know what you all think! Hope you all enjoy this as much as my friends and I did =)

Pre-Holiday detox – Day 1

eat cleanOne week from now, I’ll be travelling to Penang for a short vacation. And those of you who have been to Penang will agree with me that it is a FOOD HAVEN! So I expect myself to be piggig out quite a bit =SS  Sadly, i piled back all the weight from my juice fast so I needa be a bit more disciplined before I head to the land of street food glory.

Going to start a week of clean eating and exercise for the next 7 days as part of my Pre-holiday detox. Do expect lots of random fasts/detox on my blog ! I really LOVE food and probably have the weakest self control on planet earth, so I try to to do such fasts/detox maybe once every 2 months (or whenever needed) to keep my weight and body in check. I find that it really helps when blog it down as it makes me more accountable and disciplined.

So if you’re planning a holiday or a break, don’t wait for after the vacation to guilt yourself into a detox. Go and a pre-fast and enjoy yourself even more when on vacation!

My Pre-holiday 7 day detox plan
1) EAT clean // lots of fruits and vegetables and nothing fried, processed or heavily seasoned.
2) MOVE for at least 30min daily // If you’re not physcially active, choose your exercise carefully and don’t shock your body. Keep it simple and don’t over exert yourself. Simple excerises like brisk walking, stretching, cycling, swimming will be good.
3) SLEEP early // I personally find that when I lack sleep, I crave unhealthy food and am more likely to go off track because I’m tired and lack motivation.
4) HYDRATE yourself // drink lots and lots of water especially since you’re going to be moving more and it helps to cleanse your system!

HERE WE GOOOOOO

PRE HOLIDAY DETOX DAY 1 – DAILY MEALS

Breakfast : 1 large orange + 2 wedges rock melon
Lunch: 1 large plate of salad with guacamole & zucchini hummus ( recipe below )
Tea : 2 wedges rock melon
Dinner: 1 slice of raw blackforest cake + 1 apricot + 1/2 dragon fruit

Exercise : 5km jog (35min) and stretching (10 min)

GUACAMOLE AND HUMMUS SALAD

guacamole and hummus salad

Guacamole

guacamole
What you’ll need:
1 avocado
1 small red onion, diced
5 – 10 chopped cherry tomatoes
2 stalks of chopped cilatro
1 tsp Lime juice
Salt & pepper to taste

Here’s how : Mash avocado and mix in the rest of the ingredients.

Raw Zucchini Hummus

zuchinni hummus (Previously blogged about a zucchini hummus recipe here, but changed it up abit with a bigger portioning. The result is a more watery texture, but taste just as good.)
What you’ll need
2 medium zucchini
3 garlic cloves
3/4 cup tahini
1 tsp salt
1/2 cup lemon juice
1/4 cup olive oil
1/4 tsp paprika
1/4 tsp caynnne pepper

Assembling the salad:
What you’ll need:

DSCN8679

Lettuce leaves
1 yellow capsicum, Julianne
1 carrot, Julianne
1 grapefruit, cut into wedges
Alfalfa sprouts
Hemp seeds

DSCN8678

Assemble the plate as you see fit. Garnish the guacamole with alfalfa sprouts and sprinkle hemp seeds for that protein boost. Drizzle the hummus over the salad or use it as a dip!

Raw Blackforest Cake

Last week was my dear sister’s birthday and I decided to make her a raw version of her favourite Blackforest cake! So I excitedly told her my plan and the first words out of her mouth was “Erm…just to be sure, there’s no flour?”. Lol…can’t blame her, she has been my guinea pig for most of my raw food experiments (the good, the bad and the ones that have gone really really wrong).

Raw blackforest cake

Luckily for me, this cake turned out really well both aesthetically and taste wise. My family members really enjoyed it…but most importantly, my sister loved it! So yay (and whew!)

Raw blackforest cake

This cake was inspired by the White Chocolate Cherry Cake recipe featured in Judita Wignall’s Going Raw book.

RAW BLACKFOREST CAKE
7.5″ cake tinRaw blackforest cake

What you’ll need

CRUST
1/2 cup raw walnuts*
1/2 cup raw almonds*
1/3 cup medjool dates
Pinch of salt
Coconut oil

*would be best if the nuts are soaked and dehydrated before hand. If not, its fine too.

raw blackforest cake base

Here’s how:
1) In a food processor, grind the walnuts and almonds to flour.
2) Add the dates and salt and process until the mixture starts sticking together.
3) Pout some coconut oil on your hand and mix into the mixture. Press the mixture into a cake tin to form the base. Make sure it crust is even, especially the sides.
4) Leave in freezer.

FILLING
2 1/2 cups raw cashews (soaked for 4 – 6 hours)
1 cup nut milk (I used cashew)
1/2 cup agave or slightly less than 1/2 cup raw honey
1/4 cup lemon juice
2 drops vanilla essence
1 tbs soy lecithin powder
1 cup cacao butter , warmed to liquid (not above 46 degrees)
1 1/2 cup pitted cherries (I used about 15 cherries)

raw blackforest cake

Here’s How
1) Place the cashews, nut milk, agave, lemon juice, vanilla and lecithin in blender and blend till very smooth.
2) Pour the mixture into a large mixing bowl and add the cacao butter. Use a wooden spoon and keep mixing you can’t see the butter.
3) Pour into cake tin and smoothen the surface with an offset spatula
4) Spread the cherries evenly across the surface of the cake and slowly use a toothpick/satay stick to gently push the cherries into the filling. I had some cherries fully submerged in the filling too.
5) Place back in freezer.

TOPPING
1/4 cup cacao butter, warmed to liquid
1/2 cup cacao powder
2 tbs agave
2 drops coconut oil
Cacao nibs

Here’s how
1) Mix the cacao powder, butter and agave in a bowl till the mixture turns smooth and chocolately.
2) Pour the mixture into a piping bag and drizzle chocolate over the cake.
3) Leave in the freezer to chill and save the excess chocolate in a bowl.
4) Before serving, sprinkle cacao nibs and shave some of the excess chocolate on top of the cake.

raw blackforest cake

raw blackforest cake

Raw blackforest cake

Tadah, ready to serve!

Homemade Cashew Milk

I love making my own nut milk because its fresh, more affordable and just tastes different from the store bought ones. If its your first time making nut milk, Cashew milk is probably the easiest and most fuss-free milk you can start off with.

2013-06-18 18.05.02

Before I start, you should know that the “raw cashews” you purchase in the stores aren’t really completely raw. The raw cashew nut is protected with a shell which contains the urushiol, which is the same chemical that you’d find in poison ivy and can be toxic when ingested. When cashew nuts are sold as a “raw” product, the cashew has actually been steamed to release the urushiol prior to packaging.

Even though I make Almond milk more regularly, I still love my Cashew milk from time to time.

3 reasons why I love Cashew milk
– EXTREMELY EASY to make! No need for a nut milk bag or cheese cloth.
– Thick and creamy
– Great for smoothies!

HOMEMADE CASHEW MILK
Raw, Vegan, Gluten free

What you’ll need
1 1/2 cups raw cashews (soaked for around 4 hours )
2 1/2 cups water
2 large medjool dates (pits removed)
Pinch of salt
2 drops pure vanilla essence

2013-06-18 18.02-tile

Here’s how
1) Blend all the ingredients in a high speed blender till smooth (you should not feel any nut bits). This will probably take 1  – 2 min. If you don’t have a high speed blender, you may need to blend it longer….or get some nut bits in your milk.
2) Pour and store in glass jar for 3 – 5 days.

Easy right?

Here are 2 simple smoothie recipes you can try with your freshly made cashew nut milk

CHOCOLATE “MILKSHAKE”

IMG_20130618_181009

What you’ll need
1 cup cashew milk (cold)
1 heaping tbs of cacao powder
1 1/2 frozen bananas (preferably ripe!)
2 drops vanilla essence
4 cubes of ice
Cacao nibs for topping (optional)

Here’s how
Blend all ingredients in a high speed blender and top with cacao nibs!

GREEN CREAMY SMOOTHIE

IMG_20130619_102711

What you’ll need
1/2 cup cashew milk
1/2 cup water
3 frozen bananas (preferably ripe!)
1 large bunch spinach
3 – 4 cubes of ice

Here’s how
Blend all ingredients in a high speed blender and top with your favourite toppings. In the pic above, I topped it with pomegranate seeds, cacao nibs, blueberries, hemp seeds and goji berries.

The Life Changing Fruit & Nut Loaf

Hi all,

Continuing on from my previous post, wanted to share how I attempted to make My New Root’s Life Changing Loaf  …The Life Changing Fruit and Nut Loaf. Wanted to make it more moist because the combination of psyllium husks, chia and flax seeds are thick and chewy!IMG_20130614_170755

Before I start of the recipe, wanted to share this video I came across when I was researching on psyllium husks in gluten free baking. These amazing little husks are a great source of dietary fibre  and a natural binder in recipes!

Ok to be honest, I wouldn’t go as far as to call this loaf life changing because I’ve had better vegan/GF loafs before. But given the simplicity of this recipe and wholesome ingredients (what! no sugar/flour/ baking powder?) … I think it’s definately worth your time =)

IMG_20130614_170836

THE LIFE CHANGING FRUIT & NUT LOAF  (adapted from My New Roots)
Makes 1 loaf. Vegan

INGREDIENTS:
Dry–
½ cup sunflower seeds
½ cup dried cranberries/blueberries/raisins
½ cup flax seeds
½ cup hazelnuts
1 cup rolled oats
1/2 cup blended or mashed bananas (around 2 bananas)
2 Tbsp. chia seeds
4 Tbsp. psyllium seed husks (3 Tbsp. if using psyllium husk powder)
1 tsp. fine grain sea salt (add ½ tsp. if using coarse salt)
Dash of cinnamon
Wet–
1 Tbsp agave
3 Tbsp coconut oil
1 1/4 cup water

HERES HOW

2013-06-13 18.29.17 1. Set aside two bowls. In the first mixing bowl, combine all dry ingredients and mix well. Whisk agave, oil and water together in the second bowl. Add this to the dry ingredients and mix very well until everything is completely soaked and dough becomes very thick (if the dough is too thick to stir, add one or two teaspoons of water until the dough is manageable). Transfer the mixture to the loaf tin. Smooth out the top with the back of a spoon. Let sit out on the counter for at least 2 hours, or all day or overnight. To ensure the dough is ready, it should retain its shape even when you pull the sides of the loaf pan away from it it.

2. Preheat oven to 350°F / 175°C.

3. Place loaf pan in the oven on the middle rack, and bake for 25 minutes. Remove bread from loaf pan, place it upside down directly on the rack and bake for another 30-40 minutes. Bread is done when it sounds hollow when tapped. Let cool completely before slicing (difficult, but important).

4. Store bread in a tightly sealed container for up to five days. Freezes well too – slice before freezing for quick and easy toast!

IMG_20130614_171004

Raw Chocolate Ganache Tart – BEST RAW CAKE EVER

Heelllo all, Happy Sunday! Its been a crazy busy week for me and I’m in serious need of a good night’s rest….hopefully your week has been less tiring.

Anyway, today’s recipe post is gonna BLOW YOUR MIND! Im sure of it cos it blew mine right outta the window!

Presenting, the Raw Chocolate Ganache Tart     IMG_20130517_191923

HOLY SHIT, this is the best raw chocolate cake I’ve made and one of the best I’ve tasted….!! Please forgive my crude language and excited exclamation marks, its a natural response once you’ve had a bite of this rawsome goodness.

IMG_20130517_192356

Got recommended this recipe by one of the instagrammers I follow (@cheryleatsveg). I never fail to get motivated and inspired by the raw/vegan community on instagram.  So I modified the recipe a little because I’m using a smaller springform pan and luckily for me, it turned out really well too. If you are using a larger pan, you can try the original recipe here.

RAW CHOCOLATE GANACHE TART by Laura Coexter

IMG_20130517_212230

INGREDIENTS (7,28″ pan)

THE BASE
– 1 cup almonds or hazelnuts (I used almonds)
– 70 g dates, pitted
– 1/2 tsp salt

THE FILLING
– 1 1/2 big ripe avocados ( I used 3 small ones because its quite hard to get the real large ones in SG. I might probably add another 1/2 in future)
– 70 g cacao powder
– 1/3 cup coconut oil
– 100 g raw coconut sugar
– 1/2 tsp vanilla essences
– Pinch of salt

HERE’S HOW
1) In a food processor, blend the almonds. Add dates and salt and blend till the mixture turns dough like. Add in 1 tsp of coconut oil and mix it in with your hands.

2) Press the dough into the pan to form the base. Leave in the freezer to harden overnight.

IMG_20130517_171141

3) Place all the filling ingredients in a food processor and process till smooth. Taste as you go along, I had to add more salt to bring out the chocolately flavour. Pour the ganache over the base and send it back to the freezer for around 2 – 3 hours.

IMG_20130517_171059

And tadahhhhhh! Enjoy a slice of heaven =)

IMG_20130517_212432

Raw Sunflower Pate

IMG_20130508_191013

Other than raw desserts, my other all time fav dish to make is…DIPS!

OKay, so its not really a “dish” per say but I simply loveee making it. One reason is because dips are so versatile! They can be used as a sauce, a spread, a paste or simply as in tasty dip to dunk your plain vege sticks in (in my case, I sometimes eat it out of a bowl, like rice. disgusting right hahaha)

I have to share this really delicious and EASY raw pate (spreadable paste) that I just made. So pleased with the way it turned out! Brought it to work to let the chefs and colleagues try and they loved it too!

RAW SUNFLOWER PATE
RAW , VEGAN, GF

INGREDIENTS

1 1/4 cup raw sunflower seeds
13 pcs of sundried tomatoes (mine were pretty small pieces)
2 tbs olive oil
Zest of 1 lemon + lemon juice
1 clove garlic
1/2 cup fresh basil leaves
1/2 tsp agave
1 tsp tamari
Generous pinch of salt
Pinch of pepper

HERE’S HOW

1) Soak sunflower seeds for at least 4 – 6 hours or overnight.
2) Soak sundried tomatoes in olive oil overnight (if so, use only 1 Tbs of olive oil later on) or in hot water for 5 – 10 min to allow it to soften
3) Process all ingredients together till it becomes a pastey texture. Taste as you go along and stop when you find the consistency you like best. I personally like mine a thick and not that smooth.

Too dry? Add a little water or olive oil.

IMG_20130509_142919

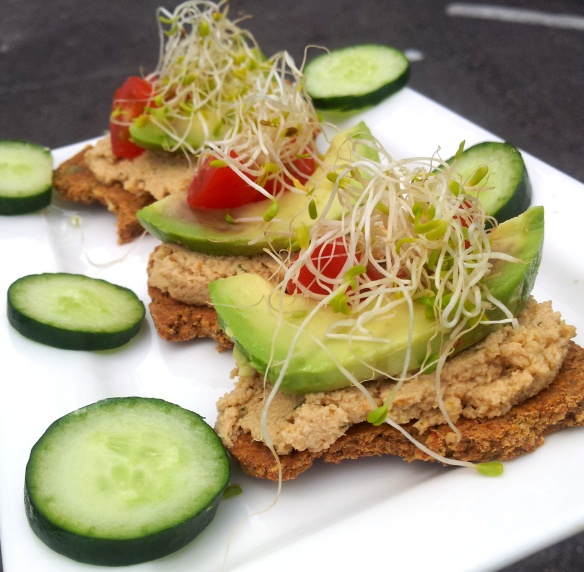
Used it a a spread for a mini tapas lunch I made for myself – with homemade raw almond bread , tomatoes, avocado and alfafa sprounts. Sadly the bread wasn’t fantastic, but I’ll get a post up once I perfect the recipe

IMG_20130509_142830

Such a satisfying meal. Hope you enjoy it as much as I do!

Ps/ second batch of sunflower seeds soaking while I’m typing this post.